 digitalsynth.net
Yamaha TG77 Backlight Replacement
Just after the coronavirus pandemic and lockdowns hit in the spring of 2020, I found a Yamaha TG77 for sale in Germany on eBay. At that time we knew very little about the coronavirus, so obviously there were concerns of whether the virus could be transmitted through a postal package. Now it seems ridiculous, but we really were facing something that we didn't yet know how to deal with.
I bit the bullet and bought the Yamaha TG77 anyway, and the only problem with it was that the backlight had completely faded. That was no surprise; after all, the device was 29 years old (now 31 years), but it made operating it a litte difficult. Also, it didn't come with the original manual, as is often the case with old synths. The material is available as PDF files, but it's not the same.
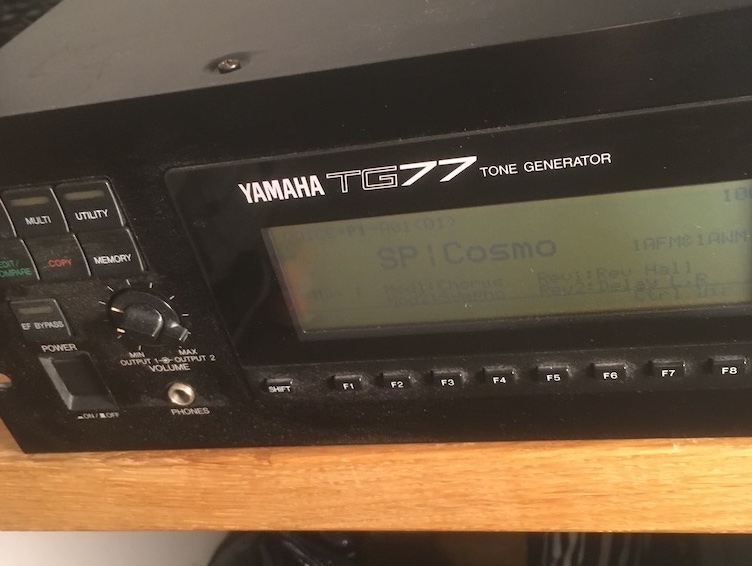
However, I wasn't using the TG77 as often as I should have, or could have if the backlight was good. So I started to contemplate replacing it. It was obvious to me that there was nothing wrong with the display as such, just with the backlight.
I found an excellent write-up about replacing the electroluminescent (EL) panel by Mike Andrews, at the website of backlight4you, a reputable vendor of replacement parts for many kinds of illumination devices. It built up my courage, although I'm not a stranger to opening up the occasional synth, replacing backup batteries and the like. However, I had not replaced an EL foil before.
It was easy to find the right EL panel from the backlight4you web site based on the synth model. Actually, many synths manufactured in the 1990s use the same display, so some EL panels fit multiple synths. I don't know much about how the panels are manufactured, but apparently they are cut to measure. The right one for the Yamaha TG77 is 43 mm by 155 mm.
EL panels come in different colors, and looking at a scan of the Yamaha TG77 brochure, it appeared to me that the original panel was a shade of blue. So I opted for the product called EL-Panel, azure blue, 43mm x 155mm, laminated in the backlight4you catalog. Of course, it's a matter of personal preference, but I wanted something as close to the original as possible.
Replacing the backlight
With the instructions from Mike Andrews at hand, I was able to quickly disassemble the required parts of the TG77, and detach the display unit from the chassis. You could probably do it just by looking at the insides and thinking hard, but if you would rather see someone do it first, there is also a video by Leading Motive (featuring a motorized screwdriver with a worklight!). It can be a little involved.
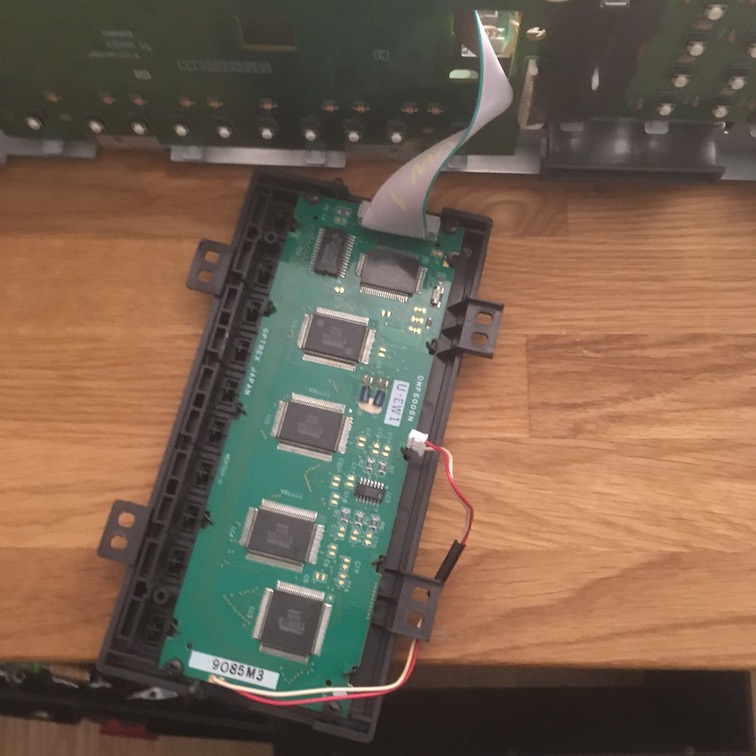
Replacing the EL panel can be a little nerve-wracking, because you will have to cut the leads of the old backlight, but as long as you don't cause permanent damage to the display circuit board, it's fine. After all, the old backlight doesn't work anyway. You could remove it, but you can just slide the new panel in over the old one. Just be careful to insert it the right way around. See the instructions and/or the video for details.
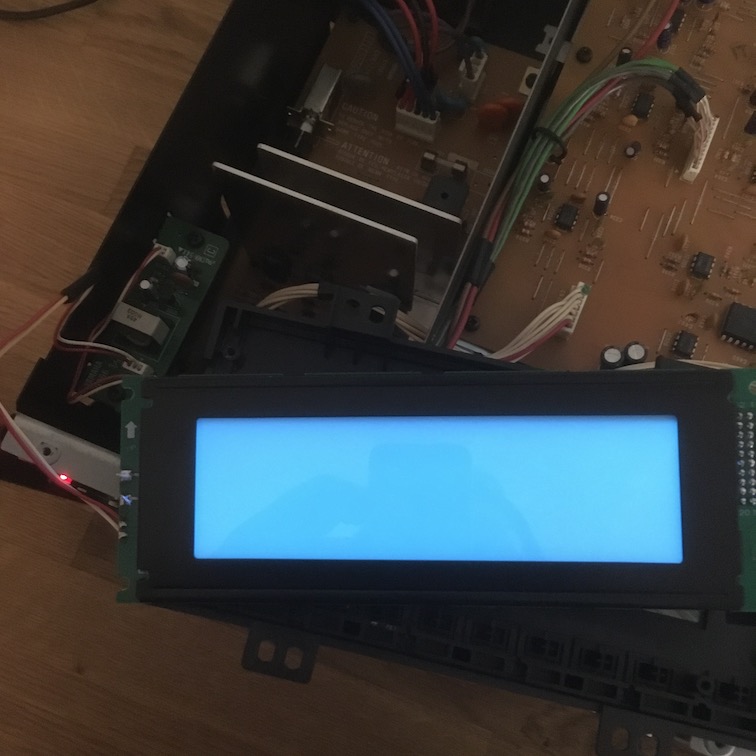
When the new EL panel is in place, and the leads have been soldered, it's a good idea to test that it works. DANGER! HIGH VOLTAGE! You can power up the TG77 while it is disassembled, just to test the display, but DO NOT HANDLE THE POWER SUPPLY. Do this at your own risk. You have been warned.
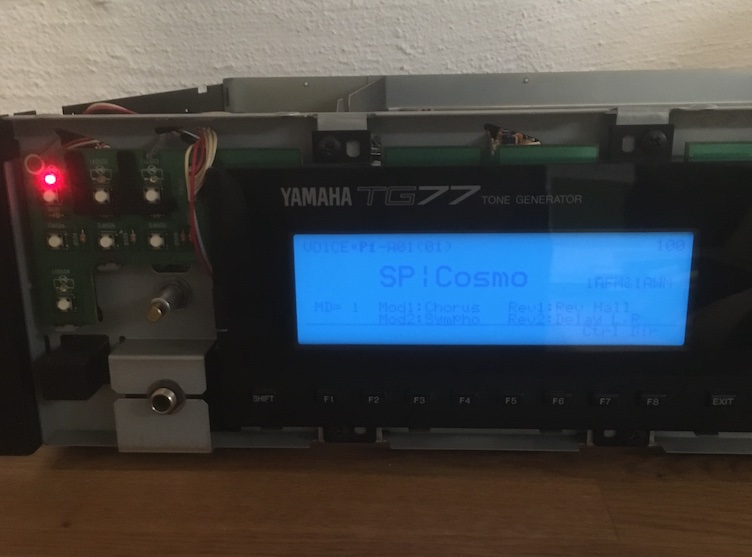
After you have tested that the new backlight works, it's time to start putting the TG77 back together again, in reverse order as compared to the disassembly. When you get the display back in place and connected again, you might want to test the unit once more before replacing the cover, just to be sure that everything is still OK. It would be frustrating to have replaced the cover and all the screws, and then when turning on the unit the display would not be working anymore. In the photo below I have assembled the TG77 only halfway. Somehow this photo reminds me of Star Trek The Next Generation:
"I am TG77 of Borg. You will be assimilated."
If you'd like to read about the Yamaha TG77 from the time it was released, an article by the late Martin Russ, titled RCM in a Rack, is available on mu:zines.